Creating and viewing access tokens
See Details
Table of contents
You can create and view access tokens from the website and command line interface (CLI).
Creating access tokens
Creating granular access tokens on the website
-
In the upper right corner of the page, click your profile picture, then click Access Tokens.

-
Click Generate New Token, then click Granular Access Token.

-
In the Token name field, enter a name for your token.
-
(Optional) In the Description field, enter a description for your token.
-
In the Expiration field, enter a token expiration period. The date must be at least 1 day in the future.
-
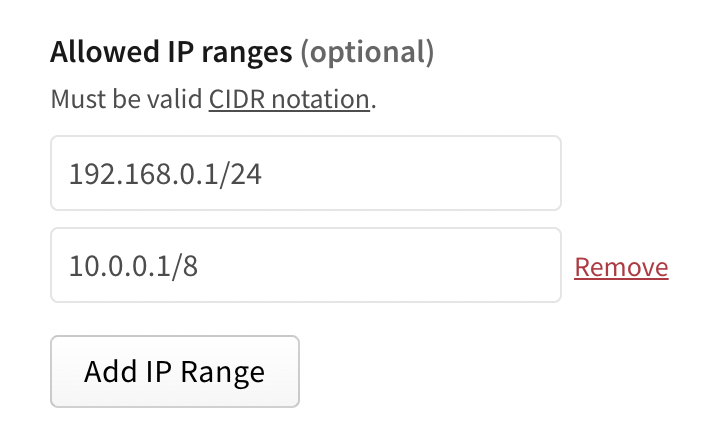
(Optional) In the Allowed IP Ranges field, enter IP address ranges to restrict your access token to. You must use CIDR notation to enter IP address ranges. To add more than one allowed IP range, click Add IP Range and enter an IP range in the new text field.
-
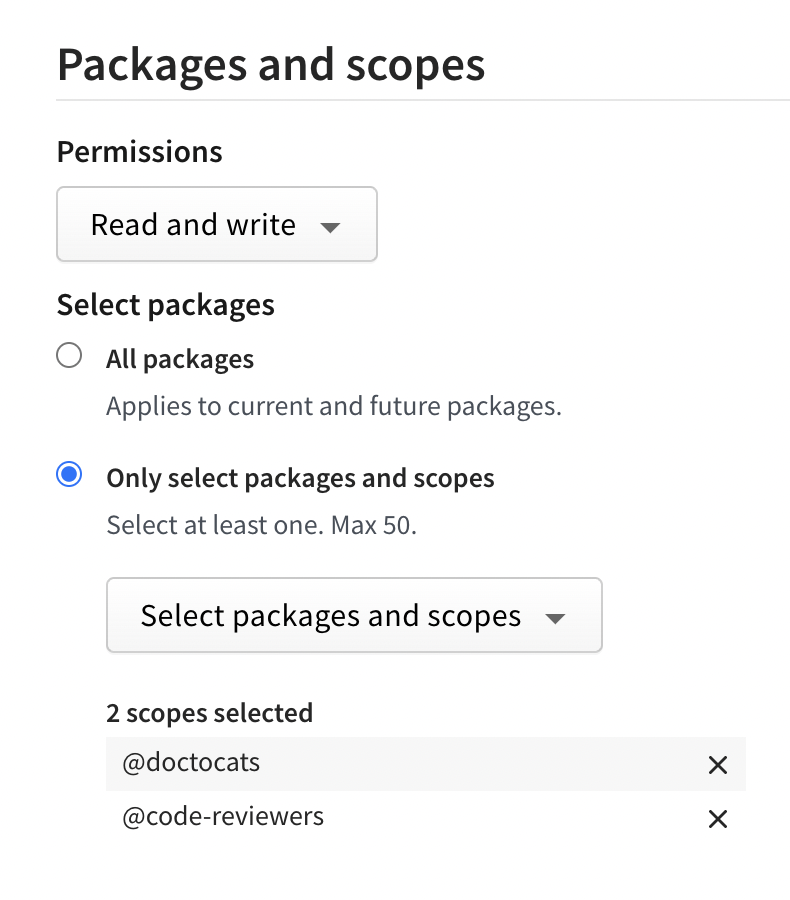
(Optional) In the Packages and scopes section, configure your token's access to packages and scopes.
- In the Permissions dropdown menu, select No access, Read-only, or Read and write.
- Under Select Packages, select either:
- All Packages to grant the token access to all packages the user account has access to.
- Only select packages and scopes to choose up to 50 specific packages or scopes to give the token access to. Then select specific packages or scopes from the dropdown menu.
-
(Optional) In the Organizations section, configure your token's access to organizations.
- In the Permissions dropdown menu, select No access, Read-only, or Read and write.
- Under Select organizations, select the organizations you want to grant your token access to.
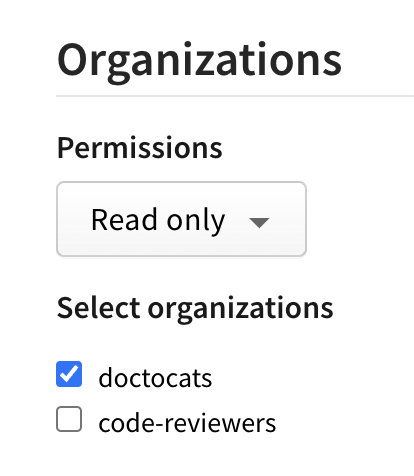
Note: When you give a token access to an organization, the token can only be used for managing organization settings and teams or users associated with the organization. It does not give the token the right to publish packages managed by the organization.
-
Review the token summary, then click Generate Token.

-
Copy the token from the top of page.
Creating tokens with the CLI
Note: You cannot create granular access tokens from the CLI. You must use the website to generate these types of tokens. For more information, see "Creating granular access tokens on the website."
Viewing access tokens
Note: Full tokens are never displayed, only the first and last four characters will be shown. You can only view a full token immediately after creation.
Viewing tokens on the website
To view all tokens associated with your account, in the upper right corner of the page, click your profile picture, then click Access Tokens.
Viewing tokens on the CLI
To view all tokens associated with your account, on the command line, run the following command:
npm token list
Token attributes
- id: Use the token ID to refer to the token in commands.
- token: The first digits of the actual token.
- created: Date the token was created.
- CIDR whitelist: Restricts token use by IP address.